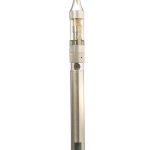
The Triton Mini is comprised of five replacement coils used with Triton Mini tanks. Vapers can select any resistance for the replacement coils giving them control over their tanks.
Users with temperature-control enabled devices can use is a Ni200 coil with red O-Rings as a replacement coil. The Ni200 is the best fit for direct lung inhalation. Vapers should however go easy on the temperature levels, lest they blow out the battery.
Kanthal and Clapton coils are recommended for mouth to lung inhalation. Here is how to get started with a Triton Mini:
Clean the tank
The Triton Mini tank is easy to open up and reassemble. This makes cleaning it easier, increasing its durability. A clean tank increases vapor and maintains the intended flavor. The wicking material is made from Japanese cotton to enhance flavor, and ensure users get a good puff of the flavor.
Replace the coil
It is easy to replace Triton Mini coils. You simply open the bottom part and remove the burnt coil. Then place in the new coil by screwing it in, and closing the tank. Not only is the replacement easy, but fast and clean.
Refill the e-liquid
Fill the tank with juice by pouring some on the Japanese organic cotton. Close the bottom part of the tank and wait for the juice to settle in the wicking material, before vaping your way to cloud nine.
It is important to note that when starting to vape, the power level should be low to prevent blowing the coil. Gradually increase the power to your desired levels.
Signs That a Coil Needs Replacement
The first sign that your Triton Mini replacement coil has burnt is a decrease in vapor production. A burnt taste of flavor and leaking e-liquid are signs of a burnt coil that needs replacement.
Check out our website mtbakervapor.com for more details on correct usage and maintenance of Triton Mini replacement coils and tanks.

